Motoring grace under heat and pressure
By Les Bengtson
British sportscars have an undeserved reputation for being coolant geysers. One of the most common fallacies is that their radiators aren’t up to the task of preventing boil-overs. The reality is that properly functioning factory cooling systems normally do a sufficient job of keeping these cars’ engines at proper operating temperatures. Cooling problems usually result from faulty parts somewhere in the system rather than from design flaws. This article gives an overview of isolating cooling problem culprits, fixing the faults, and even improving efficiency with aftermarket products.
Flow-Check
The first test is to note under what conditions the temp gauge ventures into the danger zone: highway speeds or in-town traffic. The engine’s mechanical cooling fan is intended to dissipate radiator heat in low airflow situations, about 20 mph or slower. Slow-speed or stop-and-go overheating problems normally point to a fan-related problem. If this is the case, begin by looking underhood for a radiator shroud, which directs fan air toward the cooling fins. If one isn’t visible and the car was originally equipped with a shroud, buy and install a replacement. If a shroud is in place, inspect it for cracks or broken areas and replace as necessary. Another fix can be as easy as verifying that the fan is blowing in the correct direction—a not-uncommon occurrence in later MGBs and E-Type Jaguars.
If the coolant is running hot at highway speeds, airflow is likely misdirected. As with the radiator shroud, underhood ducting and seals direct cool airflow across the radiator fins and help evacuate hot engine air from the compartment. For example, TR4-TR6 cars have fiberboard ducting between the grille and radiator. A torn or deteriorating ducting shroud allows incoming air to miss its intended target, compromising cooling efficiency. Some cars, such as later MGBs, also have a fiberboard air-duct panel underneath to help channel air toward the radiator.
Along the same lines, MGBs have a shroud that mounts to the radiator and directs air across the fins. (Moss offers a retrofit fan shroud for MGAs, 459-645.) The MGB shroud seals to the hood to further trap air, and replacing this seal when it shows signs of deterioration can help solve cooling woes. As an example of how critical airflow is to cooling, MGBs with V-8 conversions rarely suffer cooling problems because mounting their through-fender headers requires opening up extra airflow paths.
Hardware Inspection
If the air-routing equipment passes muster, conduct a standard visual inspection of the appropriate engine components (with the vehicle shut off and cool). Check the fan belt for cracks or glazing on the portions that contact the pulleys. Cracked belts will eventually break, and glazed ones can slip on the pulleys. Also check the tension. The belt should deflect about ½ inch when you push on it between the alternator and crankshaft pulley. Tighten or replace the belt as necessary.
Next, inspect all the hoses for cracking. (“New” hoses might’ve sat in a hot warehouse for months before you bought them.) If the hoses look good, check where they attach to the radiator, water pump, and the thermostat housing (water elbow). If you see a buildup of crud or an actual leak, tighten the hose clamp.
Look for signs of water leakage around the water pump pulley. This indicates a bad seal. Then, try to shake the pulley or fan back and forth. If it moves, the water pump bearings are beginning to die and the pump should be replaced. Lastly, check the radiator cap to see if its rubber seal is cracked or stiff and replace as necessary.
Pressure Test
Once the external visual inspection is complete, further cooling problems can be isolated with a pressure tester. This unit includes a hand pump with a pressure gauge on it and a flexible line running to a cap, which attaches to the radiator filler neck or expansion tank. Attach the tester to the radiator or tank and pump the system to the designated pressure on the radiator cap. Ideally, the gauge should hold pressure for at least 30 seconds; any cooling system leaks will cause the gauge’s reading to drop. External leaks are often obvious—water will seep from the offending points. Be sure to check around the heater core and under the dash. Invisible leaks often mean bad news: a blown head gasket (also indicated by white tailpipe smoke and curdled-milky oil on the dipstick) or a cracked cylinder head.

The pressure tester replaces the cap, either on the radiator itself or on the expansion tank if so equipped.
Most pressure-testers have an adapter for checking the radiator cap. Once again, pump up the tool. The cap should hold pressure up to its psi rating. The lower the pressure, the lower the temperature at which the coolant will boil, so a 16psi cap that vents at 13psi might still be operational, but won’t be at peak efficiency.
The thermostat is an easily misunderstood component. This mechanical device keeps the coolant from flowing through the radiator until the thermostat opens. Simplistically, the thermostat determines the engine’s minimum running temperature, and its heat rating is the temperature at which the thermostat begins to open. A thermostat is fully open at approximately 20 degrees above its temperature rating. So, a 195-degree thermostat might not be fully open until the coolant reaches 215 degrees Fahrenheit—three degrees over the boiling point of water.

Use a pan of heated water and a thermometer to check the thermostat. The spring should begin to retract at the thermostat’s rated temperature.
Thermostats fail in two ways: by sticking fully open or fully closed. In the former case, the car doesn’t fully warm up and the heater runs cool. On the other hand, the engine begins to overheat if the thermostat never opens. Engine damage can result. This fact alone makes biennial replacement an inexpensive form of preventive maintenance. Thermostats can be tested in the kitchen as outlined in the accompanying photo and caption. Failsafe Thermostats (434-235 for TR7 and Jaguar, 434-205 for most other British cars) are designed to only fail in the open position and offer an additional level of safety.
Bypass-style thermostats were stock in many early Jaguars and Triumphs up through the TR4. Coolant circulates through a bypass pipe, and a specially designed thermostat controls a sleeve that opens and blocks the pipe. On these cars, replacing a faulty thermostat with the same bypass-style unit will improve cooling system operation.

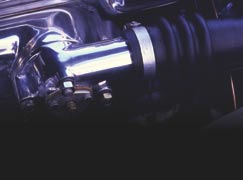
TRs and Jags originally had special thermostats with sleeves that control a bypass tube connected to the thermostat housing. Moss offers replacements (434-155).
In many cars such as the MGA, MGB, and Spridget, the cylinder head itself has a bypass passage. Early versions of these cars were also fitted with a bypass-style thermostat. The passages were small, so later cars could use a standard-style thermostat without problems. In extreme situations such as racing, removing the thermostat and installing a blanking sleeve to close off this passage increases cooling efficiency. Moss offers factory-repro blanking sleeves (434-135).
Changing a thermostat is straightforward. On newer cars, the job may require loosening the air pump and possibly disconnecting the air-rail lines. Next, drain the cooling system. Remove the thermostat housing bolts, followed by the housing itself. (Tapping the housing might be necessary). Remove the thermostat, then scrape old gasket material from the head and thermostat housing. Put in the new thermostat and gasket, then secure the thermostat housing. (On paper gaskets, use non-hardening gasket compound and tighten firmly. For cork, use a thin layer of RTV and tighten gently.) Reinstall any removed parts and refill the cooling system. Consider replacing the thermostat every two years in conjunction with a cooling system flush.
Flush & Fill
Flush the cooling system every two years. The easiest way is to use a radiator-flush chemical, following the directions on its bottle. Remember that anti-freeze is toxic, so capture and dispose of it properly.
Coolant is more scientific than most people realize. The correct mix of anti-freeze and water is crucial for optimal cooling system efficiency. The water itself also matters. Play it safe and never use tap water in your cooling system: hard water’s minerals can build up and cause water pump failure. Instead, buy distilled or demineralized water.
Never use water alone in the cooling system. Anti-freeze serves four vital functions that water doesn’t: lowering water’s freezing point, inhibiting rust, lubricating the water pump, and modifying coolant flow to reduce bubbling at the pump’s impeller.
The mixture of water and antifreeze is also worth discussing. Many sources recommend a 50-50 mix of water and anti-freeze. This provides good anti-freeze protection down to about -34 degrees F, but compromises hot weather performance. As a cooling medium, water is assigned a value of 1.0; anti-freeze has a cooling value of 0.6. So, anti-freeze transfers heat only 60% as efficiently as water, making a 50-50 mix only 80% as effective as straight water. Here’s the mathematical formula: percent water x 1.0 + percent anti-freeze x 0.6 = cooling system efficiency. An equal mix of water and anti-freeze works out to .50 x 1.0 = .5O plus .50 x 0.6 = .30, or 80% effectiveness. In hot weather, consider using 75% water and 25% anti-freeze for 90% system effectiveness (.75 x 1.0 = .75 plus .25 x 0.6 = .15 equals 90%).
A final cooling system trick is to improve the coolant with a heat transfer chemical such as Water Wetter (220-115). This product has flow modifiers that improve heat transfer between the coolant and metal. The manufacturer claims that Water Wetter can make a cooling system run as much as 15 degrees cooler. Many racers swear by it, and Water Wetter is yet another possibility for improving cooling system performance.
The gist here is that cooling system inspection and regular tune-up are good investments compared to the cost of overheating. Preventive maintenance and rudimentary troubleshooting can save the expense and headaches of a blown head gasket, warped head, and possibly worse.


'Cooling System Fault-Finding' has no comments
Be the first to comment this post!