


Not rocket science nor brain surgery…
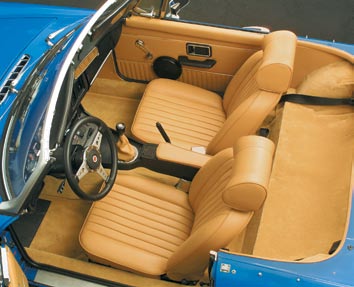
Old carpet stinks. Particularly in roadsters, ancient fibers can develop terminal cases of mold and mildew. Decaying cut-pile not only looks and smells bad, it can contribute to human respiratory problems. Luckily, re-carpeting is one interior-resto job that can be competently done by the conscientious British sportscar owner. Highlights of an MGB carpet job are shown here.

1. Remove the seats, side panels, and old carpet. Verify side-rail carpet fitment, then (permanently) glue these pieces into place, front piece first. Cut seatbelt holes with a sharp knife and small gussets in the rear pieces if necessary for a flat fit.

2. Next, install the rear wheelwell pieces. Molded kits fit flat, and budget unmolded kits will lie flatter if heated. On later cars, the carpet needs to be cut to expose the rear seatbelt mounting bosses.

3. The rear kickup carpet is next. The vinyl tab is exposed, so carefully lay it on the battery ledge first. Then form the carpet toward the floorboards, leaving the corners till last–they’ll need to be trimmed at the sill rails.

4. The kit’s “scrap” pieces cover the exposed steel by the wheelwells.

5. Footwells are high-traffic areas. Meticulously glue down the tunnel-side material first, then the firewall panel. In later cars, the factory secures the firewall panel with self-tapping screws. Use an awl to locate the original holes or drill new ones in the bulkhead. Repeat for the passenger’s side footwell.

6. Replacement kits use carpet behind the brake handle in lieu of the original black vinyl. Unscrew the handle, move it away from the tunnel, then cut a slit at the bottom of the carpet and lower it in behind the handle.

7. If trans-tunnel padding isn’t affixed to the carpet, install and trim it to clear the seatbelt mounting boss. Attach the front carpet, then fit and trim the tunnel carpet around the shifter opening. Cut a small hole for the lever, then enlarge the hole after the carpet is fitted.

8. For the underseat carpet, use an awl to find the seat holes and cut a circle of carpet and padding at each location. Then install the interior panels, trimming the carpet where necessary.

9. Snaps are now installed on the footwell and battery-cover carpets. These allow the carpet to be lifted out for drying or for access to the battery compartment.
10. Male snaps are riveted through the vinyl edge of the kick-up carpet and tonneau (if required). Finally, install the seats by lining up the alloy and wooden spacers, pop in the battery cover carpet and floor mats, and enjoy your newly carpeted interior.
By Kelvin Dodd; photos by Clark W. Nicholls
'Re-Carpet Your Ride' has 1 comment
July 29, 2020 @ 2:37 pm Colin Brent Cohoe
What kind of glue to use