


A few years ago I sold my beloved Austin-Healey 100 in order to continue my quest to own as many interesting old British sports cars as possible. I wanted my next car to be a good all-arounder. I like to tour, autocross, and just tool around or take the wife out to dinner on a nice night, so I wanted something that could do all those things well.

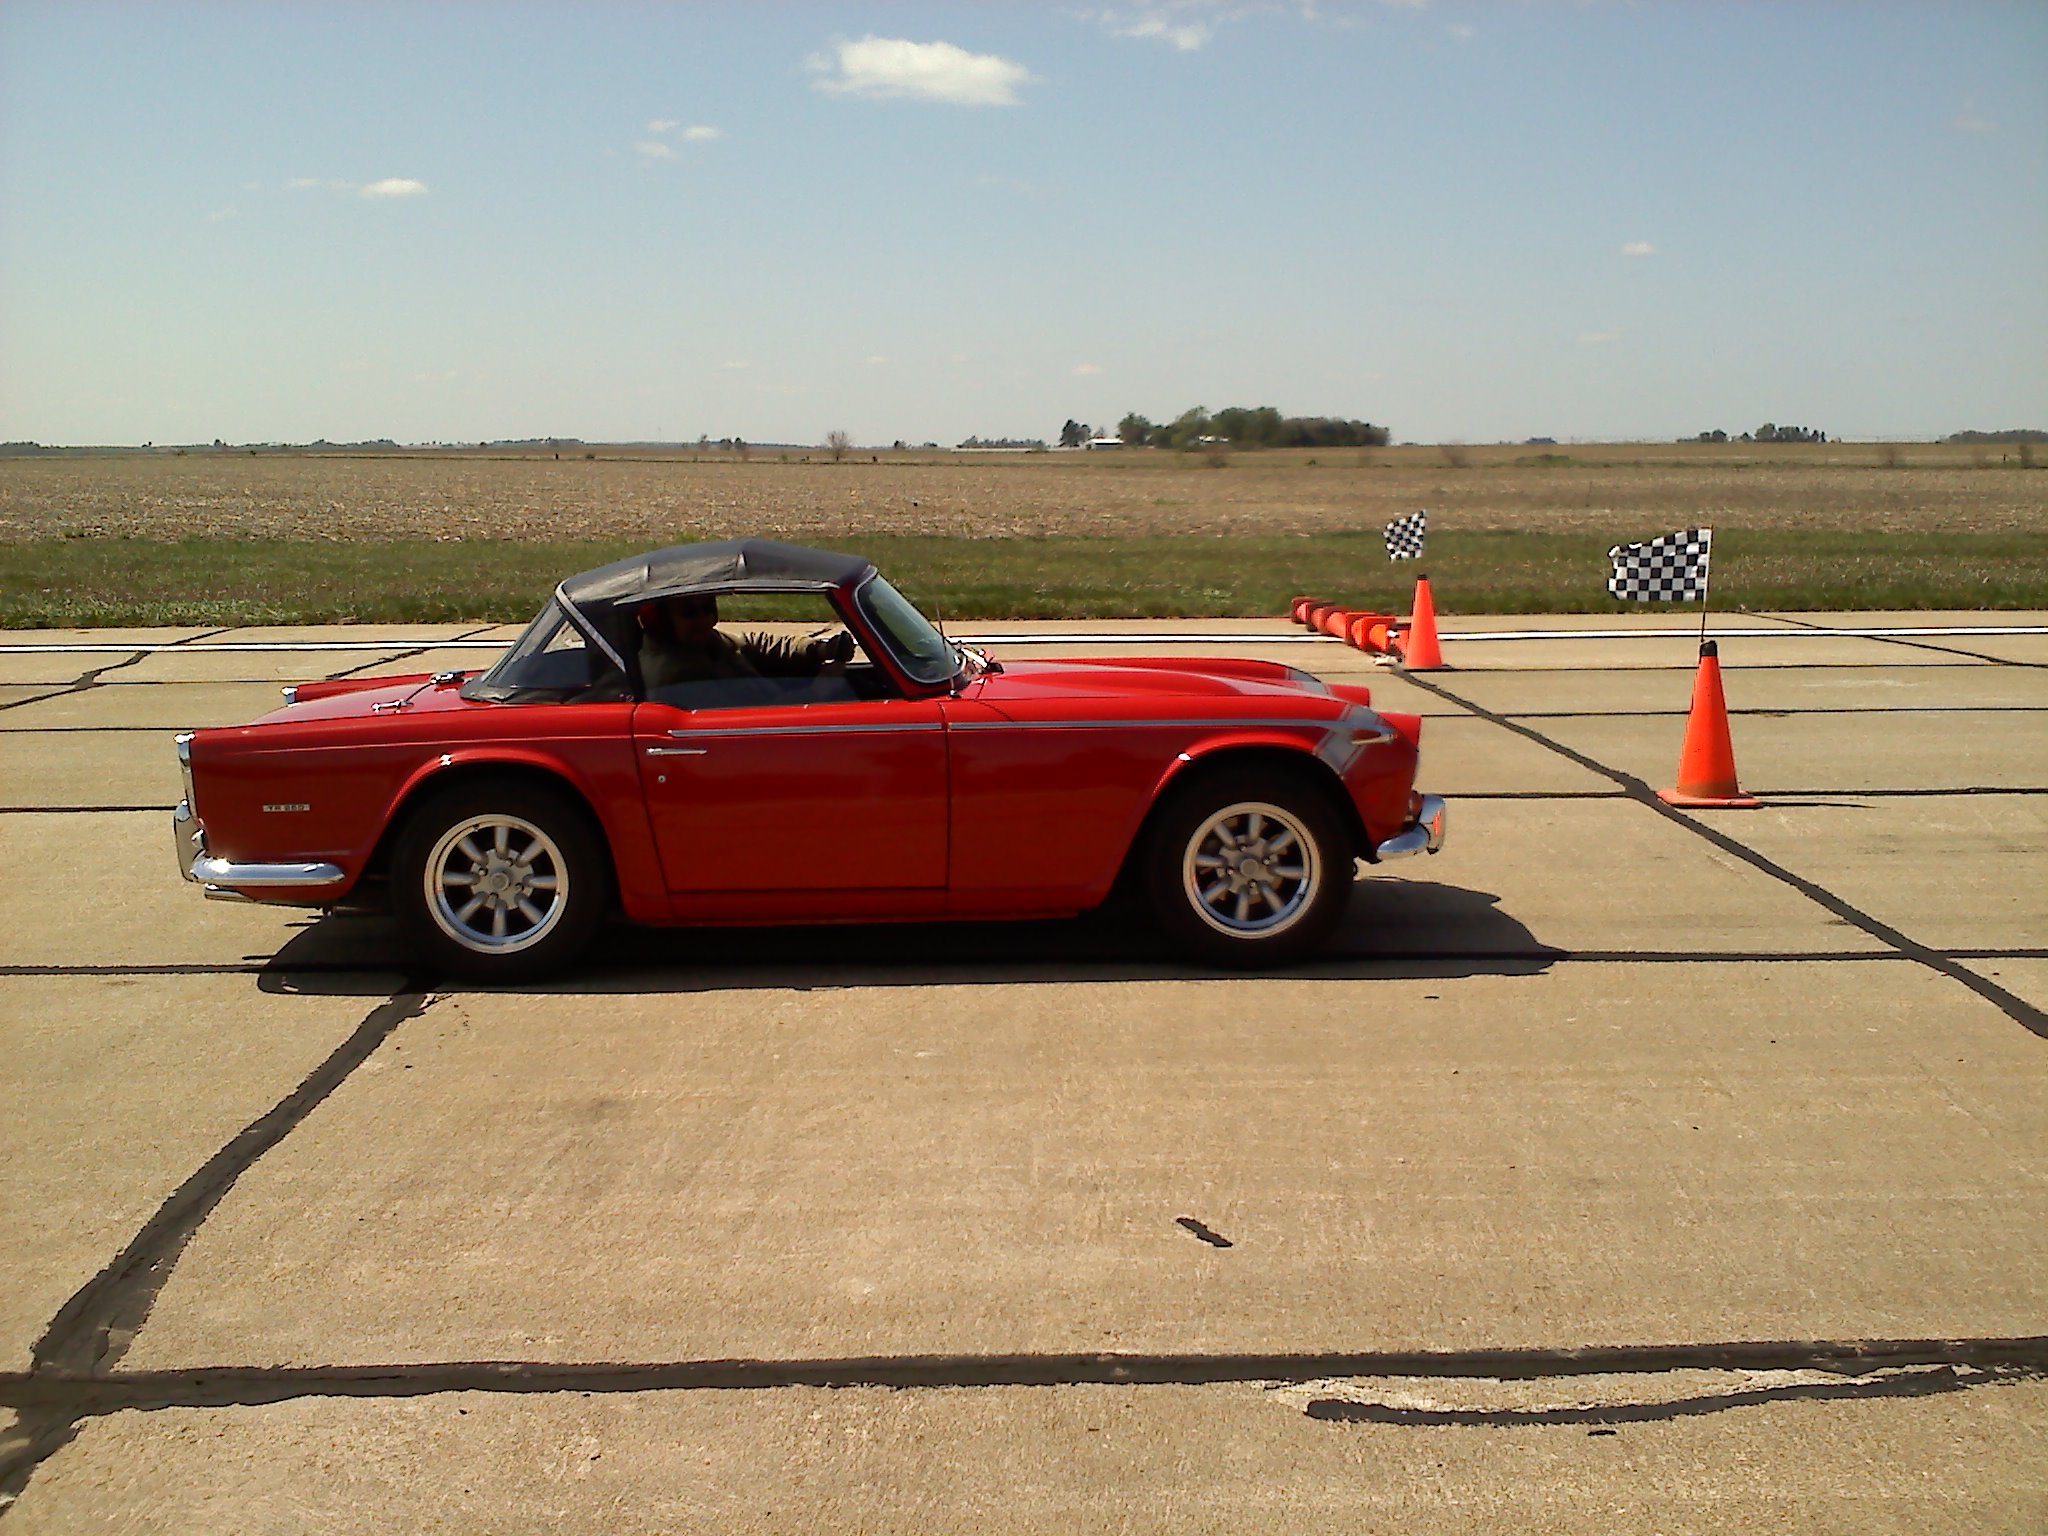
Ready to tackle the quarter mile at the Flatwater Austin-Healey Club’s “Airport Speed Run.”
I settled on a TR250 for my project, partly because I always wanted one and hadn’t crossed it off my list yet. And partly because, in addition to the criteria above, I also like good looking cars, and to my eyes the Michelotti bodied TRs are pretty sharp. I owned a solid axle TR4A years ago, so I figured the same package with the silky six and independent rear suspension would solve some of the 4A’s issues. I also liked the exclusivity of the one year of production only TR250.
I ended up purchasing a TR250 project sight unseen on eBay. I probably overpaid for it; it was certainly a little worse than described (rust, some TR6 bits cobbled on), but I was going to re-do it all anyway. I put it down to a lesson learned and pressed on with the restoration and upgrades.
The Ultimate Goal
I wanted to retain the original appearance and not make any radical changes to the car. I did want to upgrade performance where I could, but without compromising drivability, reliability or comfort. I have seen quite a few cars where the owner had decided to push the performance envelope, and ended up with something that might be quick, but was not much fun to drive around town.
I started by acquiring and reading all the restoration guides and competition and performance books for the 6-cylinder TRs I could get my hands on, including the Roger Williams’ books which are a great resource, to figure out what upgrades to perform.
Engine

The best of the old and new: TR4A carbs and air filters, TR6 cooling fan.
The six cylinder in the TR250 was released with a very conservative cam specification and low compression ratio in order to meet the first year of US emissions regulations in 1968, so it has plenty of room for development. With the goal of increased power, but no loss of driveability or reliability, I went with modest upgrades to enhance performance. The car’s engine was actually in very good shape. My machinist and I agreed that we could get by with new rings and bearings, a polish to the crank and a hone to the cylinders. I had the cam reground to a spec described as “low torque,” taking advantage of the torquey, low-revving nature of the long-stroke six. The grind being similar to, but slightly more conservative than, the one used on the 150 HP fuel injected TR5 manufactured alongside the TR250 and sold in the other parts of the world that had not yet decided to regulate exhaust emissions.
I had the head skimmed to raise the compression ratio from stock 8.5/1 to a calculated 9.5/1 and upgraded the timing gears and chain from the single roller used on the early cars to the double roller used on the later models and also installed a new, upgraded oil pump. I ground away the sharp edges in the combustion chamber to help avoid pre-ignition, matched up the intake and exhaust ports to the head and ground away some of the casting ridges in the head and manifold, but did not do a full polish and port job.
I also added a Pertronix electronic ignition, had my distributor rebuilt and recurved for the engine’s performance characteristics, and fitted the 13 blade big red cooling fan from the later TR6s for greater cooling capacity.
Intake and Exhaust

Interior before…
I live in a state that has no smog testing and probably never will. When I discovered the carbs on my car were actually from a later TR6 I decided an upgrade was in order. I wanted to keep the original look of the stock Strombergs, but without the limited adjustment and all the emissions valves that make them more complicated to tune and get right. Luckily, the TR4A used an earlier version of the carb, which is much simpler and has a broader range of mixture adjustment. It is very similar to the period SUs, except that the Strombergs have a rubber diaphragm instead of machined pistons to maintain the appropriate vacuum in the carb, and the float is under the carb instead of on the side. I personally feel that much of the bad reputation the Strombergs have in British car circles comes from experiences with the later emissions Strombergs and the earlier carbs are the equal of contemporary SUs for performance and reliability.

Interior after.
I rebuilt a pair of TR4A Strombergs with new throttle shafts and a thorough cleaning and polish. The only real issue on the install involved the throttle linkage. I had to reverse the triangular bell crank on the manifold and make some trial and error adjustments to get proper range of motion, but the old carb and the new manifold all mated together with no new parts needed. I noticed the stock air filter cover was very heavy and looks rather restrictive, so I replaced it with TR4A air cleaners, which cost about the same as the paper elements in the stock filter. Later, I bought big velocity stacks, and fit those for autocrosses and shows.
For the exhaust I fit the later TR6 dual piped manifold, which I calculated to have considerably more airflow capacity, and hooked up a stainless steel dual muffler sports exhaust for better flow and a custom look.
Drivetrain
The transmission was not in great shape and had several internal bearings and bushings that were broken. The car did not come with overdrive, and because one of my goals was a relaxed tourer, I wanted to do something to keep the revs down and the MPG up on the highway. In the spirit of keeping specification and operation close to stock, and because I have had several cars with overdrive and the units have been fairly dependable—and lastly because I think it is kind of cool to flick the switch and kick it in and out of OD—I decided to fit an overdrive. I also had the flywheel lightened by about eight pounds.
Wheels, Suspension, Brakes and Sound
I fit a bolt on tube shock rear suspension kit and replaced the rear trailing arm bushes and upper inner front a-arm bushings with polyurethane for better control. The car came with two TR6 steel wheels, two TR250 steel wheels, and no hubcaps, which are rare and expensive for the TR250 and early TR6, so I decided to fit some wide alloys, going with a 15 x 7” wheel and 205/65 tires. The wheels hit the front suspension upper a-arms on full lock, but some work with a grinder on the ends of the a-arms solved that problem in short order. I also fit front and rear sway bars, which probably made the single most noticeable difference in handling. I lowered the car slightly by fiddling with how the rear suspension arm brackets are fit and by lowering the front spring pans about half an inch. The only upgrade to the bakes was a change to ceramic front pads.
I hate a car that sounds like a bucket or bolts when you go over a pothole or railroad tracks, so I attacked possible causes of those nasty noises. In addition to using proper grommets for cables and wires, making sure the exhaust didn’t vibrate against anything and making sure fuel and brake lines were properly secured, I also put in new fuzzy linings in the window channels in the doors, my old TR4A had worn out channels and the windows rattled on every bump. The new channels were a great addition in making the car feel more solid going down the road, and I think it is an item that is overlooked in many restorations.
The Results
 There certainly was a lot of labor and tweaking that I don’t have space to go into here, but in the end the car turned out as planned. Now that it is done I sometimes think I could have gone a little more aggressive with the engine mods. Then again as built it runs as sweet as stock, no lopey idle, good power down low, and it is pulls strongly to 5000 rpm. I had the chance to do a timed quarter mile last year and ran a 17.28, compared to Road and Track’s 17.8 for the stock TR250. I was hoping for closer to a second off the time, so when I ran again this Spring I put some velocity stacks on the carburators, went back to the stock (slightly smaller) yellow fan, and richened the mixture a little bit, and ran consistent 16.7s, an appreciable gain. Now that is more like it! I think I had the most success with the suspension upgrades, I drove the car a little bit before I fit the sway bars, and I could tell they really transformed the handling. It has stable, well balanced behavior in corners and the ride is still good. The car corners flat and puts the power down much better out of a tight corner than my old solid axle 4A.
Lessons Learned
Plan ahead. If you want to upgrade any of the more common British sports cars, the Triumphs, MGs, and Healeys and Jaguars, there are a lot of books available as well as great internet resources. Figure out where you get the most bang for your buck and decide what you want as the end result. Remember that if you go beyond a certain point there me be a trade-off in drivability, reliability, and comfort. If you go about it the right way you can do a lot of improvements with little or no downside for a really nice all around British sports car.
By Greg Lemon


'The All-Arounder' have 3 comments
September 13, 2013 @ 8:44 am Ken Lydford
If this is the car I saw last weekend at the Vintage Race weekend in Watkins Glen; then it is truly spectacular. You have done yourself and the marque proud.
Ken
December 13, 2013 @ 8:08 am TOM T
Thanks for the story and the pics. I used your interior pic as my desktop background to help motivate me this winter. A few years ago I noticed a Austin Healey sitting in a garage covered with all kinds of stuff. I went back weeks later and talked to the wife about the car . She said her husband was not interested in selling it. I thought I was being real clever when I ended the conversation by saying if he sold me the car maybe he could buy some shelves to put all that stuff on. A few weeks later the man did call and offered me another Healy he had sitting in a garage of a rental unit he owned. It was a 1961 3000 in rather rough shape. Before touching anything I took pics of this barn find all covered with recycling papers and misc junk. I paid his asking price ($1,500) and got the car home as quickly as I could. Within a couple hours I had gas in it and it ran sweet and idled smooth. The sad part to this story is that as I was in the garage the other day and I looked over at the car There it was in my garage now with a pile of stuff on it, not as much as the other guy but still uncalled for. Your story is the kind that motivates people like me . I think this is the winter I finish the car. Thanks so much. Tom
March 20, 2014 @ 7:40 pm Greg Lemon
Thanks for the kind comments, hadn’t been here for a while, it was not my car at Watkins Glen, I wish it was (I am in the Midwest, hope to get back to Road America one of these days). I am certainly no superman about getting cars done, it took me a about 2.5 years and an increasingly unhappy wife as I go pretty fixated on getting things done at the end. I don’t think I will have the gumption to do a major protect like this for a couple years, but I did recently buy an old BNW 2002 to just get running and tinker with, having great fun with it.