


 Almost Anyone Can Properly Install a Convertible Top
While a convertible top can last 20-plus years if cared for properly, the day will come when it needs to be replaced. A piece of cloth can only last so long. While some people consider this a job for professionals, it’s really not that difficult—if you’ve got a patient demeanor and a few special tools.
Before replacing the top, you’ll first want to consider what type you want to purchase. There are often choices of color, material and, in some cases, functions or features. For your application, you may be able to choose between cloth or vinyl, one or three windows, and maybe even a zip-out rear window. There may be more than one manufacturer of tops for your car as well, and if you ask around, you may find that some offer higher quality than others.

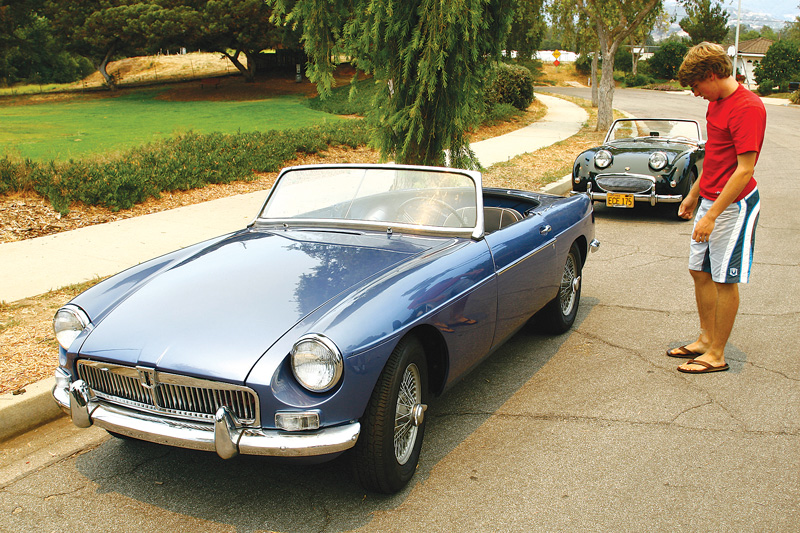
This MGB's top was about 15 years old. The back window had yellowed and many of the snaps were torn out. The time had come for a new top.
What to Buy?
If originality is your goal, then you’ll want to pick the color, material and style that are correct for your car. If you want a different look or better functionality, then you may want to consider some changes or upgrades.
For example, most British cars came with black vinyl tops fitted with fixed windows. You may consider a cloth top for a more elegant look, while a zip-down rear window may also be available for your particular top bows.
Cloth tops are generally easier to install and handle temperature fluctuations well, but may fade over time. Zip-down rear windows are a great option to get more air flowing through the cockpit without putting down the top. They are especially nice on very hot days, when being under the unrelenting sun may be too much. The increased airflow with the window zipped down, coupled with the sun protection of the erected top, is often a great comfort option.

Step 1. Before we started the job, we laid the new top and header seal in the sun to let the fabric become warmer and therefore more pliable.
Be sure to look at your top bows and header rail before ordering your top. Some cars, like MGBs, were manufactured with more than one style of top bows. (In the case of the MGB, there are actually three styles: stowaway, knee-action and Michelotti.)

Step 2. We started removing the top by unlatching the header rail and pulling away the header seal, revealing the aluminum seal channel and attachment rivets below.
You may want to consider switching to another style of bows. Following our MGB example, many people believe that the Michelotti and stowaway bows are superior to the knee-action bows, so they’ll find a used set and switch them when it’s time for a new top.
Once you’ve settled on the type of top and top bows you’re planning on using, you’ll want to assess the condition of all related equipment to determine exactly what you need to order. Look carefully at your top bows and header rail to confirm that the bows are not bent, broken or excessively worn. Make sure the header rail isn’t rotten (if it’s made of wood) or rusty (if it’s steel).
Look at the seals and their channels. Look at the snaps. Finally, look at the latches and latch-mounting hardware. If any of these items are worn, broken or simply missing, then you’ll want to replace them along with the top to make sure it can be installed and operated properly.

Step 3. We completely removed the header rail from the car by undoing three screws on each side.
One last consideration that may be possible is whether you want to spend the extra money to buy a top that includes the header rail. While more expensive, these are usually much easier to install since the top has already been pre-fitted and attached to the header rail.
Prepare for Surgery
Once you’ve made these decisions and purchased the appropriate parts and pieces, you can prepare to install the top. Tools for the job include standard hand tools like wrenches, ratchets, sockets and screwdrivers, plus some specialized tools like snap installers.

Step 4. We drilled out the rivets using an 1/8-inch drill bit in a cordless drill.
A razor knife and some awls or pointed “dentist tools” are helpful, too. If the top bows or header rail are dirty or rusty, you may want some paint to clean them up. Finally, there’s glue: We prefer 3M General Trim Adhesive for jobs like this. (The part number is 08088.)

Step 5. We pulled and unglued the old top from the header rail.
Hopefully the top you’re using will include some installation instructions that make sense. If not, you’ll have to look for instructions in a manual, on the Internet, or from some friends or professionals who have been through the task before. Even with instructions, though, make careful notes as you remove the old top, keeping track of what folds on top of what and where things appear to have been trimmed.
If at all possible, use the weather to your advantage. Ideally, working in the shade on a sunny day when it’s 70 degrees or warmer is going to be your best option. You’ll be comfortable in the shade, but you can still occasionally use the sun to warm up the top and make it more pliable.
You’ll find that installing a vinyl top in temperatures below 50 degrees is just about impossible. Not only will the top be hard to work with, but your glue won’t dry very quickly.

Step 6. The header rail had a hole at one end that we could use to shake out all of the rivet parts.
Removing the Old Top
As you prepare to tackle the job, take the new top and header seal out of their packaging and lay them in the sun so they’ll be nice and pliable when the time comes to install them. Then you can move to the car itself.
Before removing the old top, repair all of the snaps, latches and other types of attachment hardware. You’ll want all of these to be functional when you fit your new top. If you take shortcuts here, you’ll be frustrated later on, since not using all the snaps or attachment points often leads to problems with fit or leaks down the road.
Next, remove the old top. This is usually a matter of unsnapping the top from the back, sometimes followed by separating it from some bows. Then remove the top from the header rail.
The most critical part of this process is carefully removing the top from the header rail. It is usually attached with rivets, screws or tacks. In the case of rivets, you’ll need to drill them out. For screws and tacks, it’s just a matter of unscrewing or prying.

Step 7. We re-attached the header rail to the top bows.
Usually the header seal is pulled out first, then all or most of the attachment hardware can be found underneath. Keep careful track of where the attachment hardware was located and where and how the top was folded under the header rail, header seal and in the corners.

Step 8. We repaired several worn-out snap studs, and then snapped the new top into place at the back.
If the header rail is a hollow metal piece, make sure to shake it out well. Most header rails have a hole or two at an end so you can shake out rust, scale or rivet pieces. If you don’t do this, you may find yourself listening to an annoying rattle every time you turn a corner or hit a bump in the road.
If the header rail or top bows need any repair or paint, do this next. If not, you’ll be ready to start installing the new top.
Installing the New Top
It’s usually helpful to start from the rear of the top, snapping or clipping the top to its appropriate mountings with the top bows erected.
Now it’s time to start using the glue.

Step 9. We sprayed some 3M General Trim Adhesive on the header rail and front of the top, then give it about five minutes to set.
The great thing about upholstery adhesive is that it’s pretty forgiving and often will give you several chances to get things right. Spray a light coating of glue on the front few inches of the top and the header rail, and then give it a few minutes to get tacky. Once tacky, it’s ready to start working.
Next, latch the header rail and pull the top forward as tight as you can get it. (An assistant is very helpful at this point.) Using a piece of chalk, mark the front edge of the top where it meets the front edge of the header rail. We’d also recommend putting a few witness marks at the center and each side of the top to make sure you get it centered and aligned properly at the corners.

Step 10. We pulled the top tight to the windshield and header rail.
It’s pretty unlikely that you’ll get the top to fit right on your first try, so carefully look at the overall fit and note where it is too tight or too loose. You can make chalk marks on or near your existing lines to indicate where to make changes.
Unlatch the header rail from the windscreen and pull it back a few inches, then pull the top from the header rail and reattach it according to your new chalk lines. Relatch the header rail to the windshield and check the fit again. If you’re not satisfied, you’ve got about three or four chances to repeat this procedure before the glue stops working.

Step 11. We marked the front edge of the top, then put some witness marks at the center and sides. As we made adjustments to the top for fit, we re-marked these lines.
When you check for fit, look carefully along the header-to-windshield sealing area and make sure you’ve got even gaps. Ensure that the top is still properly centered and fits the corners correctly. If your car has roll-up side windows, roll them up and make sure they seal against the top properly. If your car has side curtains, install them and check their fit.
Stand back and look for inappropriate wrinkles or overly tight areas. If you’re not happy with any of these areas, pull the top away from the header rail and make some adjustments.

Step 12. Once we were satisfied with the fit of the top, we folded the excess material underneath the header seal channel area.
Tight as a Drum
A subtle detail we’ve omitted thus far concerns the general “tightness” of the top. Most people like their tops to fit very tightly, with few or no wrinkles.
If you’re aiming for this fit, keep in mind that the top may stretch or shrink over time. The top will certainly stretch in the heat and shrink in the cold. Vinyl tops are very sensitive to temperature changes, while cloth tops are more forgiving.
Nonetheless, if you’re fitting your top when it’s around 70 to 90 degrees outside, don’t make it drum-tight or you may not be able to put it up on a cold evening or fall day.

Step 13. We planned to reattach the header seal channel with rivets, so we used a dentist tool to poke holes in the top material.
Following fit adjustment, finishing the top installation is usually a matter of reinstalling the header seal (usually a push-fit into a channel) and then installing any snaps that don’t come preinstalled with the top. These require a special tool, which is shown in the pictures.

Step 14. Then we riveted the header seal channel into place.
All in all, a top installation is more a test of patience and careful planning than a learned skill. It’s a good job for a weekend afternoon and, done properly, should last a long time.
Care and Feeding of a Convertible Top
A properly treated top can last 20 years or more. An abused top won’t last more than a couple of years. Here are some tips to keep your convertible top in good shape:

Step 15. Using a razor blade, we trimmed away the excess material.
Keep It Clean: Dirt is hard on a top, especially the window (or windows). Use a mild soap-and-water solution to wash the top whenever it gets dirty. You can use a brush or rag on the top to scrub it thoroughly, but don’t use anything abrasive on the window. It’s best to clean the window with a blotting action so that you don’t rub any grit into the window and make scratches.
Fold It Right: A lot of tops get ripped or stretched out of shape due to sloppy or improper folding. Make sure you understand the proper way to fold your top and follow the method religiously. Also, as you fold it, try to avoid folding directly on the windows or letting sharp edges of the top bows or latches touch the top.

Step 16. We installed the header seal using a special plastic tool used by windshield installers. If we didn't have the tool, a paint stick or even a screwdriver would have worked fine.
Fold It Dry: Never fold a wet top. You’ll be welcoming stains, wrinkles, mildew and other nasties into your top. Let it dry completely before putting it down.

Step 17. The one specialized tool we needed was a snap installer, which we got from Moss Motors. We used it, along with a hammer and a block of wood, to install the front snaps.
Latch and Snap It Right: Top snaps are designed and placed to distribute the load of holding the top in place. Use every latch, slide and snap each time you erect the top. If you are lazy and don’t use all the snaps, the remaining ones and the top material will be overstressed. They will stretch areas of the top and eventually cause rips or broken snaps.

Step 18. The finished top had a few minor wrinkles, but everything worked great. The wrinkles would work themselves out during the next few weeks, as the top was exposed to the elements and some stretching and shrinking occurred.
Leave It Up for Storage: For long periods of storage, leave your top up, not folded away. It will keep its shape much better if it’s left in this position.
Story and photos by Carl Heideman
'Top Secrets' have 7 comments
September 21, 2012 @ 11:40 pm Willis Smit
I wish i read this link of yours before i installed my new top. I had to learn from my own mistake about the rattles in the header rail.
I also found that the Moss supplied top seemed too wide at the front so that the side windows caught the bottom of the rain channels when you close the door with window up. I had to stitch the sides up with staples to get them out the way.
Thanks for your article.
Willis
May 29, 2013 @ 10:23 am Lorne
I am looking for instruction on how to fold a stowaway top for transportation in the trunk. Can you direct me?
July 30, 2013 @ 6:00 pm Alf Goodall
I am installing a new top on my wife’s 69 midget and have those little bits from the rivets rattleing around inside the header. There is no hole in the header but it had occured to me that drilling one would solve the problem. Question is where to place the hole. It appears that it would be hidden by the new top if drilled close to the end of where the strip is rivetted back on.
August 20, 2016 @ 8:15 am Tim Asmondy
I thought installing the vinyl top on my 76 MGB was rather easy, at first glance. Nay nay . You make no mention on how to trim the header seal. Granted the top is not completely water tight , but rain finds its way in , thru any hole or gap. Should the header rail seal overlap the windshield pillar seals or vice versa.
April 30, 2018 @ 8:33 am Larry Tipton
The latch handle on the drivers side of the TR6 will not unlatch. Feel like there is a lot of pressure on the pin. Passenger side is no problem. The top is recently installed. Is there a left and right side latch? Or maybe the install of the top is too tight? Sure would appreciate some help on this. When I got a wrench in to the space I unbolted the latch and compared them with each other, they look the same although the pin on the shaft is a different direction on them. Thanks
July 15, 2020 @ 8:04 pm Stuart Graham
Do you recommend glueing the the frame’s rear most folding bar into place? The old top has a fabric loop that held this bar in position but that ripped ages ago. Bar has been loose ever since. I noticed there was no discussion as to how to, or whether to, affix this part of the frame to the top.
October 13, 2021 @ 12:27 pm Kurt Lesser
When I replaced the top on my ’64 MGB there were no holes in the header rail large enough to shake out the rivet remains after drilling them out so what I did was to squeeze some silicon sealant thru one of the frame attaching holes in the header top rail and shake the loose rivets so they stuck to it. Wha La! No rattling rivets!