


Dad Can’t Keep Up
By David Deboard
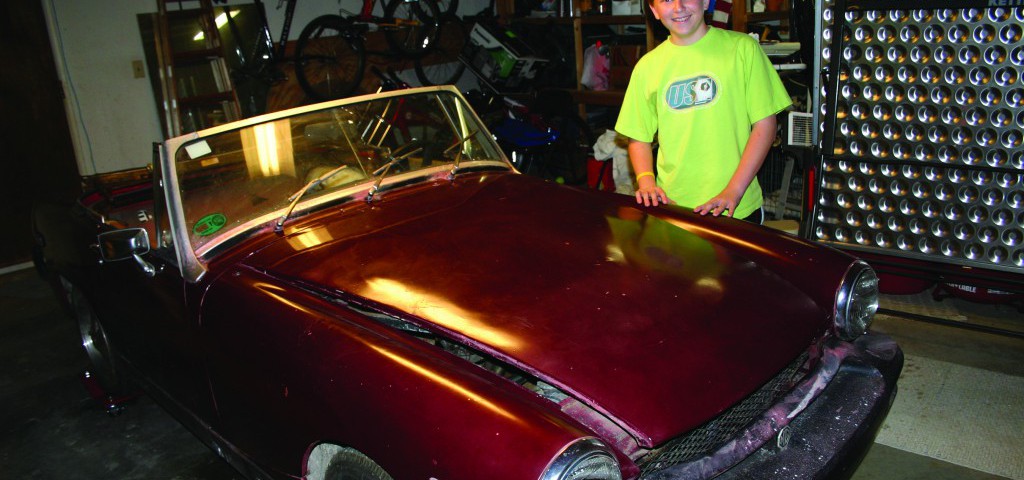
My son Eric and I have always been close. We would play video games together and play basketball and tennis. As he entered his teen years, he would continuously beat me in video games and his interest in them began to get beyond my capabilities. In some of them, I would get motion sick watching him move so quickly in those first-person games like Halo 2. In sports, he was growing to be much better and stronger. I used to teach him skills in basketball, but he is definitely schooling me now. His skills and stamina are far beyond mine. I wanted to find something that we could both do together, and that would be interesting, challenging, and would allow us to spend time together. We were having lunch at a local burger restaurant, when we began talking about it. We threw around some ideas, when we came on the idea of restoring a car. I am mechanically inclined, and knew I’d have a lot to learn, but thought that it was something we could succeed in doing together.
The Project
We browsed through the AutoTrader, and rejected a Pinto project as being pointless. We thought a Corvette, or a BelAir project would be a bit over our heads price-wise. We found a 1975 MG Midget for just a couple of Franklins. I described what kind of car it was, and we finished lunch dreaming about what we could do with it. When we went to look at the car, our spirits sank like the dreary rainy weather around us. It was a disaster. It was garaged, but the roof of the garage leaked, which might need services such as emergency roof leak repair, and there was no roof on the car. The upholstery was soaked. He shrugged, and I nodded. We decided to get it and get on with the project. Eric, probably like most guys, liked the deconstruction best. Every part of the car was taken off and we went over how each of them works. Everything went into baggies he labeled, and then into plastic bins.
Bodywork
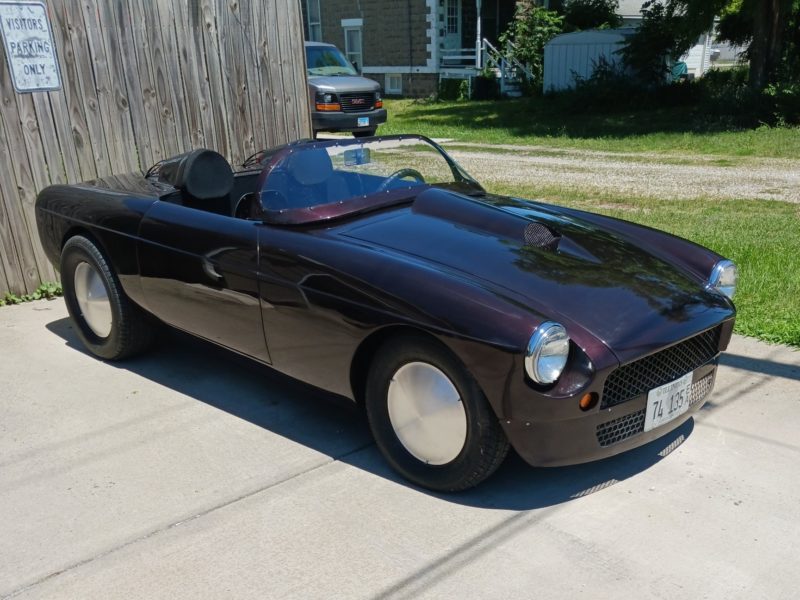
After the deconstruction, it was off to media blast. When we picked it up, we saw that every panel needed some kind of work. It looked like someone “enjoyed” moonlit nights sitting on the hood. Working the panels with body hammers and dollies was a long learning experience, and a true test of patience. The water damage to the interior wasn’t limited to the upholstery. The floor pans were Swiss cheese. We cut them out, and in the process of replacing them, learned to weld. Getting the right tools and learning to use them was all a part of the experience. Rubber bumpers aren’t available as replacements. Repairing them is the only option. Ours look great now after repairing some minor tears, gouges and refinishing the rubber. There is one blessing to block sanding. It gives you plenty of time to think. Following the hammer and dolly work was our skim coat, and primer—lots of dust. I made a paint booth out of the garage with plastic on the ceiling, a plastic curtain surrounding the car, and paper on the floor. Again, the right equipment here makes a big difference. I used a ProAir full face mask to breath outside air when painting. My wife thought we looked like we were visitors from another planet in our painters’ coveralls. She’s a very patient wife and mother. We really like the look of chrome, and thought that some subtle modifications could be made to fit this Midget up with some shine. I had a serious requirement though. I wanted to be able to re-fit the rubber bumpers back on. So the modification needed to be reversible. It took some thinking and a bit of ingenuity, but we really like the results. It now has the clean looks of a chrome bumper 1974 Midget, (slightly modified with classic blinkers). Now after a short pit stop, it can sport the original looks of the 1975 with it’s refinished rubber bumpers.
On its Feet
Having decided to modify it from stock, we wanted to adjust the ride height, and suspension too. Dropping it an inch with new shocks and springs gives it a good look. Now that it’s rolling, we feel like we’re really making progress.

Next
With the bodywork done, we’re now ready for paint. Red is the color. Upholstery and trim will be black. “Be able to stop before you go” is our motto, so getting the brake system in and working will be done before the engine work. We’ll be rebuilding the engine with the help of a neighbor who has multiple rebuilds under his belt, and our local engine shop. We’ll run the new wiring harness, and then the work on the upholstery. Then we’ll be ready for the road test. We’ve talked about how much fun it will be to take the finished Midget for a ride up the California coast. We plan to putt around town for a while before any long trips, but we’re definitely planning on the trip up PCH.
It’s Working
Eric and I have really busy schedules with his sports, basketball and varsity tennis, and my travels for work. However, the idea behind our project is working. We are spending time together, and are learning a ton. We’re working together and having fun. It won’t be long before we’re grinning and rollin’ down the highway.

Tips and Gems:
As far as lessons learned, they fall into two categories.
The first area is social, having to do with time spent in the garage with my son. He’s opened up and shared more while we are working than he’s ever done while playing games, or shooting practice shots on the basketball court. I’m really glad for the time we get to share. Also, this can be a very social hobby. There are people in your city and even in your neighborhood that have skills, and friends who know how to do things you don’t. Initially I was self-conscious about my skill level, and didn’t want to share much of what I was doing. But pretty soon my neighbors would walk by my open garage and ask about the project. I’d let them know what we were doing, and where we were in the project. I’d share where I thought my problems would be, and before you knew it, they’d be sharing about a friend who knows how to weld, and that they’d be willing to help. That’s how I got my floor pans patched and the passenger side floorpan replaced. I did have to spend some time helping him lift his 1931 Model A body off its frame and onto a stand so he could restore the frame—but that’s a story for another day.
The second area is regarding the project. As I mentioned, I was uncomfortable with some areas of my mechanical skills, and how deep I was getting. I repaired my daily driver when I was in college, but vowed not to work on a car I had to rely on.
Gem 1:
I knew that I’d have to keep track of the parts as I removed them from the car, so I put everything into Ziploc plastic bags. That’s not unusual, but as I was taking the parts off, I had the most confidence in restoring the areas I could remember how things went back together. So the areas I took before and after pictures of, went together easiest. Next time (?) I will take more pictures under the hood, and under the car where the cables run, and the plumbing. As I was removing parts, or taking them apart, my son would read the section in the Hayes restoration books about them (suspension, steering, etc.). When he was working on a part of the car I’d baggie the parts up and show him how to label them (doors, windshield fenders, hood, and trunk, seats, etc.). We stored all the baggies for related sections in boxes (actually plastic storage bins) together so that we could find all the parts without having to search through everything.

Gem 2: Painting
We painted in the garage. I stapled 2 mil plastic sheeting to the ceiling, and hung a curtain stapled to the ceiling, and taped to the floor, and covered the floor with paper taped down to eliminate as much overspray as possible. I used a 36″ box fan with a paper filter for central a/c to exhaust the make-shift booth. I taped another filter on the other side to allow flow of air into the booth trying to eliminate as much dust as possible. There are probably better ways, but this is what I could think of. I used an air pump from Eastman catalog so I could breathe outside air while in the booth. I primed the whole car, and then under coated it with rubberized paint, and then painted the interior, I’m painting all the undersides of the doors, hood, trunk and fenders next, and then will paint the exterior in one session to minimize any difference in batches/pots of paint that could affect color, or finish. Lesson learned—I had to re-finish the hood twice. I was getting hairline cracks in the primer. I think I had too much accelerator in the paint, or maybe I didn’t wait long enough between coats. FOLLOW THE INSTRUCTIONS ON THE LABEL.

First & Favorite
By Bob Flint
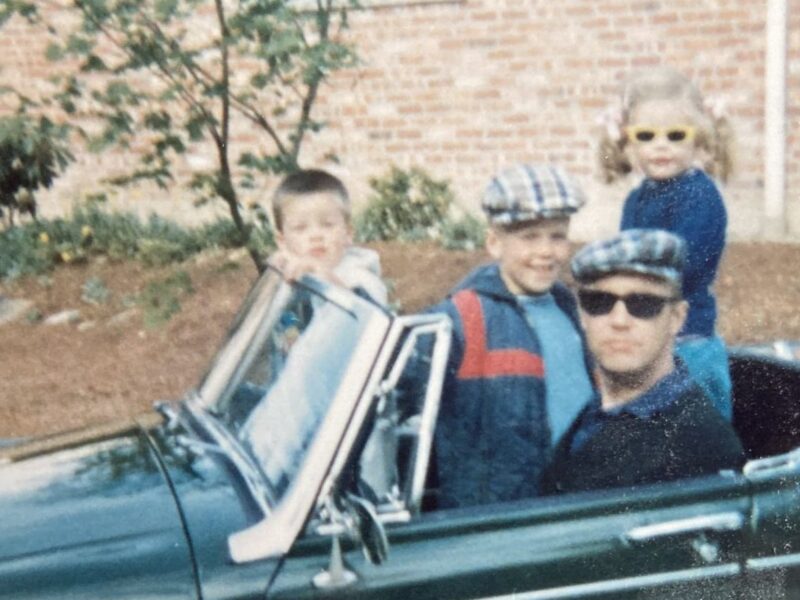
My first sports car was a 1963 Triumph TR-4 bought used in 1964 shortly after I graduated from college and got a job. It was the first in a long series of British and German sports cars I have owned, but it was always my favorite.
Thirty-seven years later I retired and began restoring British sports cars to keep busy. The first was an MGB. Shortly after starting the MG, I saw an ad in the local paper. “1963 TR4. Restored.” Turned out its restoration consisted of Bondo, galvanized tin, and an Earl Schieb paint job, but the car was complete and “ran when parked.” I trailered it home and got it running, storing the TR4 until the MG was done.
Work on the TR4 began in earnest in January 2004 with complete disassembly of the car. I restored pieces as they came off the car on the “B” but decided to restore prior to assembly on the TR4. Each method has its advantages but careful labeling, documentation, and photos are required either way.
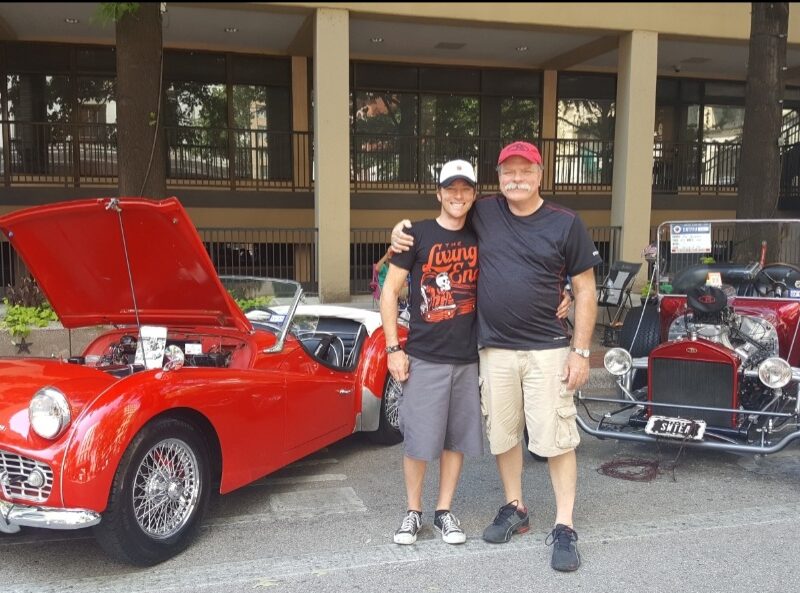
The frame was blasted and powder coated as were the suspension components. It was pretty exciting to have a rolling chassis that looked brand new. The body tub was another story. By the time it was done, the floor panels and sills, sail panels, front and rear valances, B pillars and the top of the rear fenders had been replaced or patch welded. My friend Scott Webb worked miracles repairing rusty metal on the fenders. He then blocked and sanded the various body panels from 4 to 9 times and applied the most beautiful base coat/clear coat British Racing Green paint job you have ever seen.
I rebuilt the engine, resealed the transmission and rear end, put in a new clutch, and installed them in the rolling chassis in preparation for installing the body. Once the body was on, the project became a pure joy. Starting with a new electrical harness and the restored dash, the vehicle was reassembled “from the inside out” with each freshly restored component making it more like a car. A complete new interior from Moss put the finishing touch on the car.
The restoration was finished this past spring and the car “sorted out” after numerous test drives. Its show debut was in June at our local British Car Club Show where it got “Best in Show” out of 40-plus cars. It’s a joy to drive and definitely brings back memories of my first TR-4 forty-three years ago.

Tips from Bob:
1. A “frame off’ restoration is a daunting project that few would tackle if they thought if would take 2 or 3 years to see results. You have to look at it as dozens of small projects and get your feeling of accomplishment from completing each of these. For example, powder coating a suspension arm is a project. So is assembling the left side front suspension, and so is completing a rolling chassis, etc.
2. Keep your tools organized. I put every tool away every night—no matter how tired I am. After six years and two frame offs (and numerous other projects) I have not lost a single tool. Time spent hunting for tools is time not spent working on your car.
3. If you can restore an original part rather than using a new one, do it. Moss and others have done a fine job of finding sources for replica parts, and you can’t do projects like my TR-4 without them. But there is still no substitute for an original piece if you can clean it up and make it work.
4. I use clear plastic tubs to store my parts while disassembling the car. I own over 30 of these and at the point of maximum disassembly, they are all full of labeled and bagged parts. I tape a 4 x 6 card to each tub and store parts according to their location on the car (e.g. Front suspension–Left). The plastic tubs store neatly on shelves and you can also see what is in them. Old cardboard boxes are hard to store and frustrating to use.
5. Take notes when you disassemble. Put the notes in the zip-lock bags with the parts to which they pertain rather than in a notebook. In two years, you not only won’t remember how to reassemble a component, but you won’t remember that you took notes that are buried on page 50 of a spiral notebook.

Restoration: 1959 TR-3A
By Bill Craig
As a young teenager in high school, I rode to school with a fellow classmate in a 1953 MGTD. From this point on, I knew that someday I would own a classic British sports car.
In the early ‘90s I bought a 1968 MGB, and this began my quest to own other British cars. I kept the MGB for a while but eventually sold it to a friend, who had been begging me to sell it to him.
In early spring of 2001, while riding through a neighborhood, I spotted what I thought was a Triumph. I went to the door and asked the gentlemen, Mr. Bob Carper, if I could see the car. He said “Of course,” but it was not for sale. After uncovering the car—wow! Here was a 1959 TR3A Triumph. I told Mr. Carper that he ever decided to sell the car, to please call me.
About 6 months later, I received a call from Mr. Carper. He wanted to sell the car and wondered if I was still interested, which I was. What a dream come true.

A couple of days later, my step-son Mike and I went to see if we could get the car to run. We took all the necessary tools, but after trying several times, the car would not start. We checked the distributor, and found a small copper wire was in half. We repaired that problem, funneled the carbs with new fuel, and bingo, she purred like a kitten. The car had been sitting idle for 4 years.
I began the slow process of restoration, and after many hours of rusty bolts and nuts, slowly took the car apart. To my surprise, there was little surface rust. As a person with great patience, I could visualize what this car was beginning to look like.
I ordered many parts through 2 dealers, from Moss Motors. I finally took the car to have it painted, and in 1 week, Rocky called and said the car was ready for pick-up. When I arrived at the shop—WOW! In all my days, I could not believe what I saw. The pictures tell the story.

What I learned will never be forgotten. Always be patient, because it will pay off. British wiring (another story) will drive you nuts. The most exciting thing about my restoration was the timing. The car was made in the same year that I graduated from high school, so in two years I will drive it to my 50th class reunion. I also enjoy driving it on the Blue Ridge Parkway, here in Virginia.
I drove the car to Webb Motors, in Roanoke, Virginia. Byron Webb, the owner, came out and looked at the car. He said, “A job well done, Bill.” Byron has been restoring British cars for 50 years, so what a compliment from a pro. My wife, Kathy, told me now is the time to start restoring another Triumph.

'Customer Loyalty Program Restorations: Winter 2007' has no comments
Be the first to comment this post!