


Maybe after this we can get that little car down off the jack stands…maybe.
I think last time we gave up on the back brakes and it’s time to move forward and rebuild the front calipers.
Remove the front wheels to gain access to the disk brake calipers. Afflicted with CRS? Do one side at a time so you will have the other to show how it goes back together.
Disconnect the flexible line at the flare nut end. Watch the brake fluid drip all over your newly painted frame. Fetch some water and paper towels to clean up the mess…quick, before the paint peels off! On the Big Healey, remove the two nuts that hold the brake line bracket, then the large bolts now revealed securing the caliper to the front axle assembly. Pull the caliper off the car and watch for some bow-tie looking shims that may be between the caliper and the axle. Fish them out of the puddle of brake fluid on the floor. If you don’t find any, now you know why there is a groove worn into your brake rotor.
Place the caliper in a large vise for disassembly. Remove the clips, pins, pads, and anti-squeal shims. If you don’t find any shims, then now you know why your brakes squeal. Use compressed air to pop the pistons out. Apply increasingly higher pressure to the line, until the pistons move. Place a piece of wood between them so that they won’t come flying out like little mortar shells. Above all, keep your fingers out of harms way. If one piston moves, but not the other, wire the free one in place, so that the other will move instead. If neither one moves, use a C-clamp to push them in a little, thus breaking them loose. Once the two are nearly out, remove the brake line and bleeder screw, taking care not to break anything off. A little heat will help some…a lot of heat will help more!
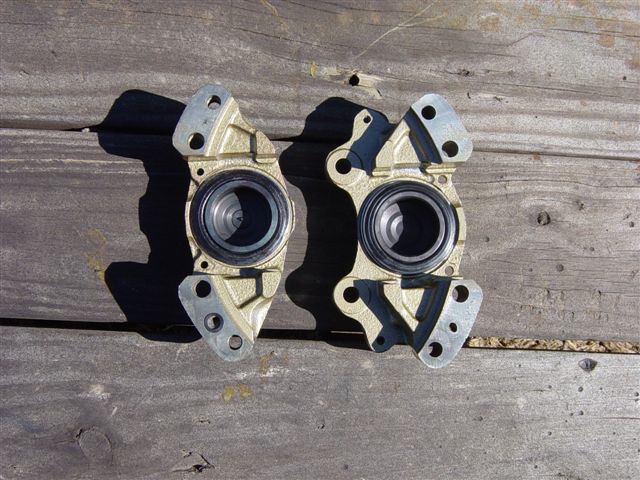
Now it is time to do the unthinkable. Yes, we are going to split the caliper! There is an urban legend stating that any mortal attempting to do this dastardly deed will be cursed to eternal damnation. Actually, the reason for not doing this was the unavailability of the little seal that goes between the caliper halves. Moss has them…part number 583-820.
 With the caliper split, blow the pistons the rest of the way out, taking care not to shower yourself and nearby objects with fluid, or knock yourself in the head with a flying piston. For safety’s sake, you had better wrap a rag around things. Remove all vestiges of the rubber seals and crud from the pistons and caliper bore. A Dremel tool does a nice job on the grooves, and a Scotch-Brite or Brillo pad will do for the rest. If the piston is not perfect, replace it. The bore only has to be clean, with grooves capable of holding the new seals. Once everything is cleaned, sneak in the house and wash the caliper halves in hot soapy water while the wife is not looking. Blow the clean halves dry, then lube the bores with brake lube (red rubber grease) from Moss, part number 220-442.
 Put a little lube on the piston seals before installing. You may have a little or a lot of trouble getting the pistons and dust seals into the bore. Better have an extra rebuild kit on hand, since you will probably screw the first one up. Take care pressing the pistons into the bore, as the piston seal can be damaged if the piston does not go in perfectly straight. An arbor press gives just the right feel for this operation. Don’t have one, do you? You should be able to set the caliper half on the workbench and press the piston in with a small block of wood, using just your body weight. For those <98 lbs…squeeze it together with a C-clamp and hope for the best.
 Bolt the mess back together. Unbolt it and place the little seal that you forgot between the halves. Bolt it back together again and torque all bolts to 2½ grunts. Might as well paint it before reassembling on the car, which is more or less the reverse of what you did previously.
Whew! That was quite a job. Crap! You still have the other side to do. Better stop and drink a beer.
The next things needing attention are the flexible brake hoses, front and rear. These items are often overlooked, but can cause insidious problems. The insides of the hoses (hence insidious) tend to swell shut over time, causing hard pedal, weak braking, and brakes that drag. You can cut the hoses off, then use a socket over the crimped end and a wrench on the nut to disassemble frozen connections from their brackets. Always unscrew the threaded connections by holding each item securely, be it a tee, solid line or whatever. Otherwise, you may twist something off! Firmly screw the flex line into the non-movable item (tee, caliper, etc.) first, then place the other end through the hole in the bracket and start the nut and star washer. Pay close attention to the routing of the line. The last thing to be connected is the line with the flare nut, which should actually be started before securing the hose to the bracket. The sloppy fit will make it easier to line things up.
In order to drink all the beer before it gets warm, the rest of this job will have to wait until next time!
By Mike McPhail


'Pint Size Project — Brake Caliper Rebuild' have 2 comments
October 8, 2016 @ 6:35 am Bill Hurley
Having problems…MG Club of Toronto gives the best instructions…moss tech told me to take to a garage, can’t afford to do that. Packages are not marked dust seal or hydraulic seal, would be a help.
January 30, 2023 @ 12:20 pm Steve M Close
It might be nice to know if the outer seals (without lips) go in before the installation of the piston, or afterward.